Build an email sequence
A sequence is an automated, multi-step email flow: a trigger enrolls a contact, then RadarSend sends emails, waits between them, and branches on how each contact engages. You build it on a visual canvas, then activate it to go live.
In this section:
- Build an email sequence (this page) — create one, add steps, test it, and go live.
- Choose an entry trigger — every trigger and the re-entry policy.
- Sequence steps reference — every step and its settings.
- Edit a live sequence — change it without losing anyone.
- Track a sequence & manage enrollments — reports, enrollments, tests, and review.
Before you begin#
- A confirmed sender, so your emails can send.
- At least one email type, so recipients can subscribe and unsubscribe.
- The emails you want to send, in your Emails library. You can also write a new one from a send step while you build.
Create a sequence#
In the sidebar, open Sequences. There are two ways to start:
- New sequence — a blank draft named Untitled sequence, opened on the canvas.
- Start from a template — a ready-made recipe, such as a welcome series, product onboarding, or re-engagement, to adapt.
On the canvas, click the name at the top (Name this sequence…) and give it a clear name. You can rename it at any time.
Set the entry trigger#
The entry trigger is what enrolls a contact: “when this happens, the contact starts at the first step.” A new sequence opens the Entry trigger window for you; after that, click Set trigger on the entry card. The options:
- Added to a list / Removed from a list — list membership changes.
- Enters a segment / Exits a segment — segment membership changes.
- Submits a form — the contact submits one of your forms, or any form.
- Contact field changes — a contact field changes, optionally to a value you choose.
- When a date is reached — a date field is reached, optionally with an offset before or after, and optionally every year.
- Score crosses threshold — a contact’s lead score moves above or below a value.
- Activity occurs — a tracked activity happens, optionally a number of times within a window.
- Clicked a link / Visited a page — the contact clicks a link in one of your emails, or views a tracked page. RadarSend waits until it has checked that a person did it, not an automated scanner, so enrollment can lag the click by a few hours.
The builder header also has the re-entry policy: Enters once (the default) or Re-entry allowed. See Choose an entry trigger for each trigger’s settings, cooldowns, and re-entry.
Add steps#
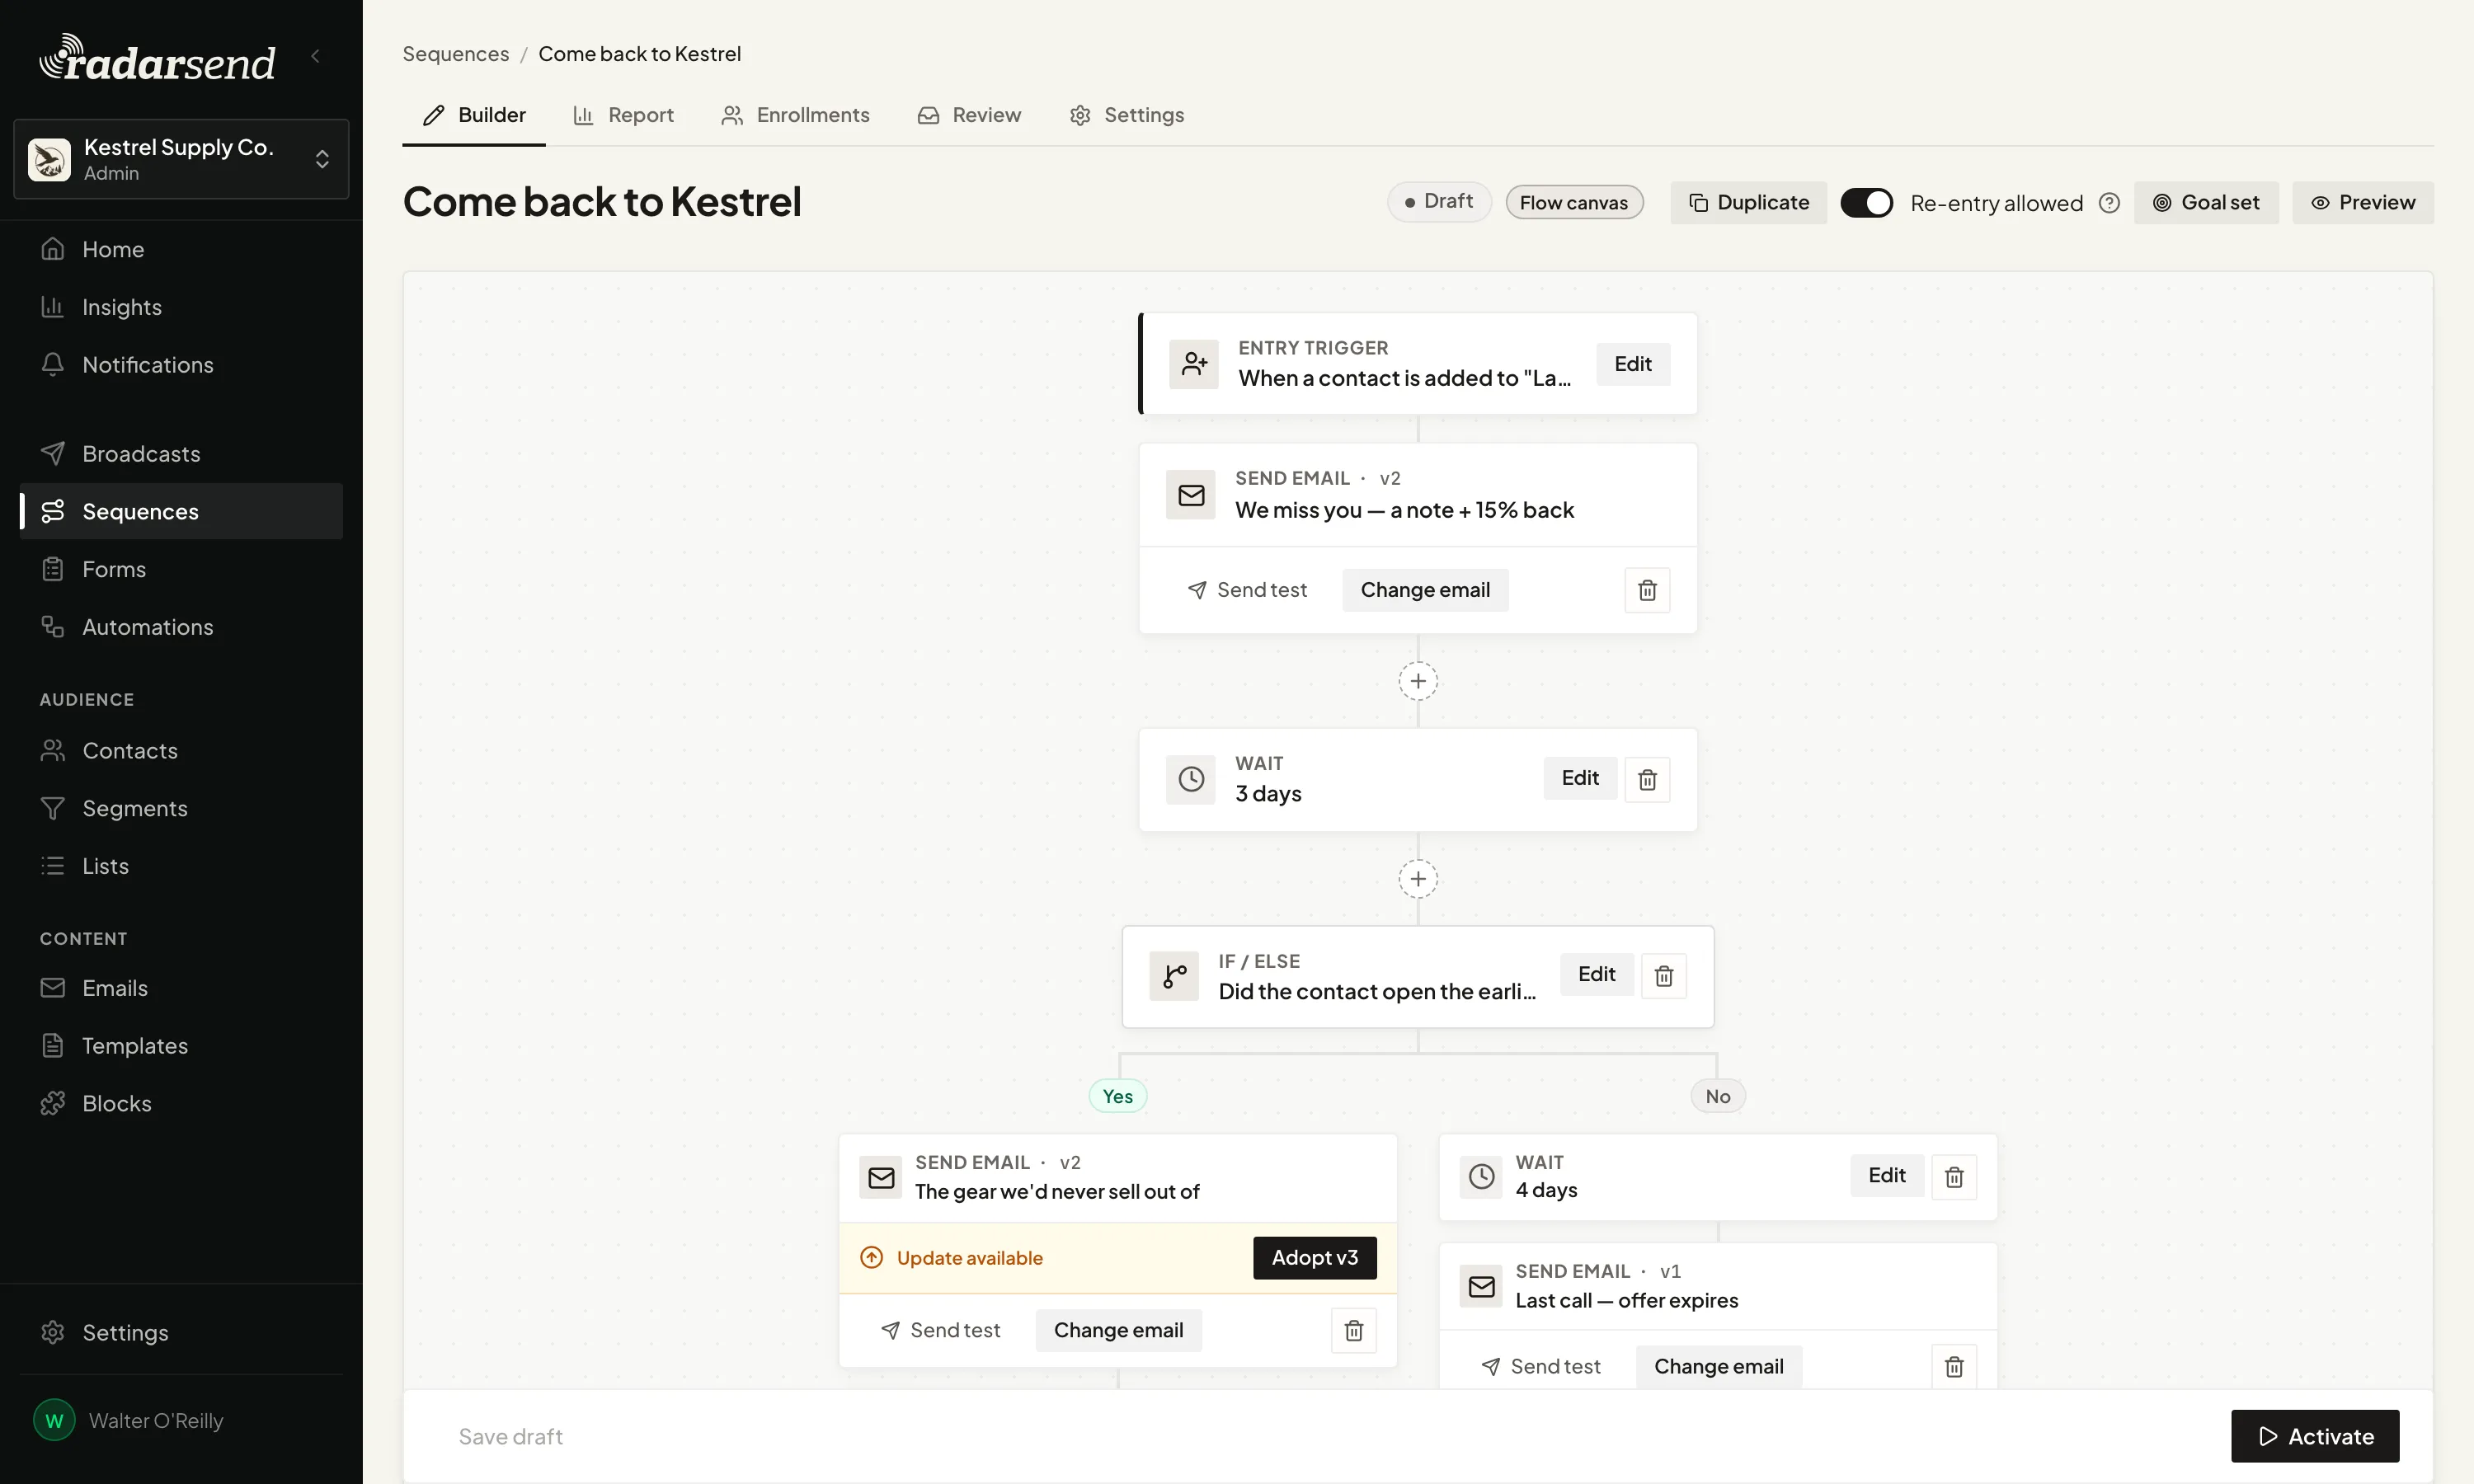
Click the + on the canvas to open the Add node menu. The first step is usually a Send email. The step types are:
- Send email — send an email from your library.
- Wait — a delay before the next step.
- If / else — one fork into two separate paths, based on a condition.
- Wait for event — hold until something happens, with separate Event and Timeout paths.
- Go to sequence — hand the contact off to another sequence.
- Action — add to a list, set a field, change the stage, or call a webhook.
- Exit / goal — end the path. Contacts who reach it count as Converted.
Click any step to set it up. Two limits apply to branching: a sequence can fork once (one If / else or one Wait for event), and an If / else can’t go inside another branch. See the Sequence steps reference for every setting.
You can also set a conversion goal from the header (the target button): the result that counts as success, such as a contact opening or clicking a particular email within a time window. Reaching the goal takes the contact out of the sequence as Converted.
Click Save draft as you go. An Unsaved changes note appears when you have edits to save.
Test and activate#
- Preview it. Click Preview in the header to walk a pretend contact through the saved steps. You choose whether they engage, how each condition goes, and whether an awaited event happens, and RadarSend shows each step they’d take. Nothing sends and nobody enrolls.
- Test a Send step. Open a Send step and use Send test to send yourself that email. Save the draft first if the step is brand new.
- Activate. Click Activate in the footer. RadarSend checks the flow first, and if anything is incomplete it marks the steps to fix. For a list or segment trigger, it also asks whether to enroll the people already there or only people who join from now on.
Once it’s active, the canvas is locked while contacts move through it. To change it, click Edit steps: RadarSend pauses the sequence, lets you edit, and contacts carry on from where they were when you Resume. See Edit a live sequence.
To stop sending without editing, click Pause. Contacts freeze in place and pick up exactly where they stopped when you click Resume.
Common issues#
- Activate is greyed out. No entry trigger is set. Click Set trigger on the entry card first.
- “This sequence can’t be activated yet.” Some steps are incomplete, such as a send step with no email chosen or a condition with no rule. Fix the marked steps, then activate again.
- Can’t edit the canvas. An Active sequence is locked. Click Edit steps to pause it and edit. An Archived sequence is read-only: unarchive it (it comes back as a Draft), or duplicate it.
- Can’t send a test. The step is new and unsaved. Save draft first, then send the test.
- Can’t delete a sequence. Only a sequence that never enrolled anyone, isn’t live, and isn’t the target of a Go to sequence step can be deleted. Archive it instead.
Good to know#
- Statuses: Draft, Active, Paused, and Archived. Drafts and paused sequences can be edited. Filter the Sequences list with the status tabs.
- Pausing is safe. Contacts freeze in place and resume from the same step.
- Duplicating makes an editable draft copy with no entry trigger and no enrollments. Set it up and activate it when you’re ready.
- Each sequence has five tabs: Builder, Report, Enrollments, Review, and Settings. Use them to track performance, manage enrolled contacts, run a real test, and approve emails by hand before they send. See Track a sequence & manage enrollments.